
Features
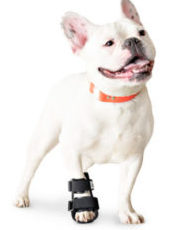
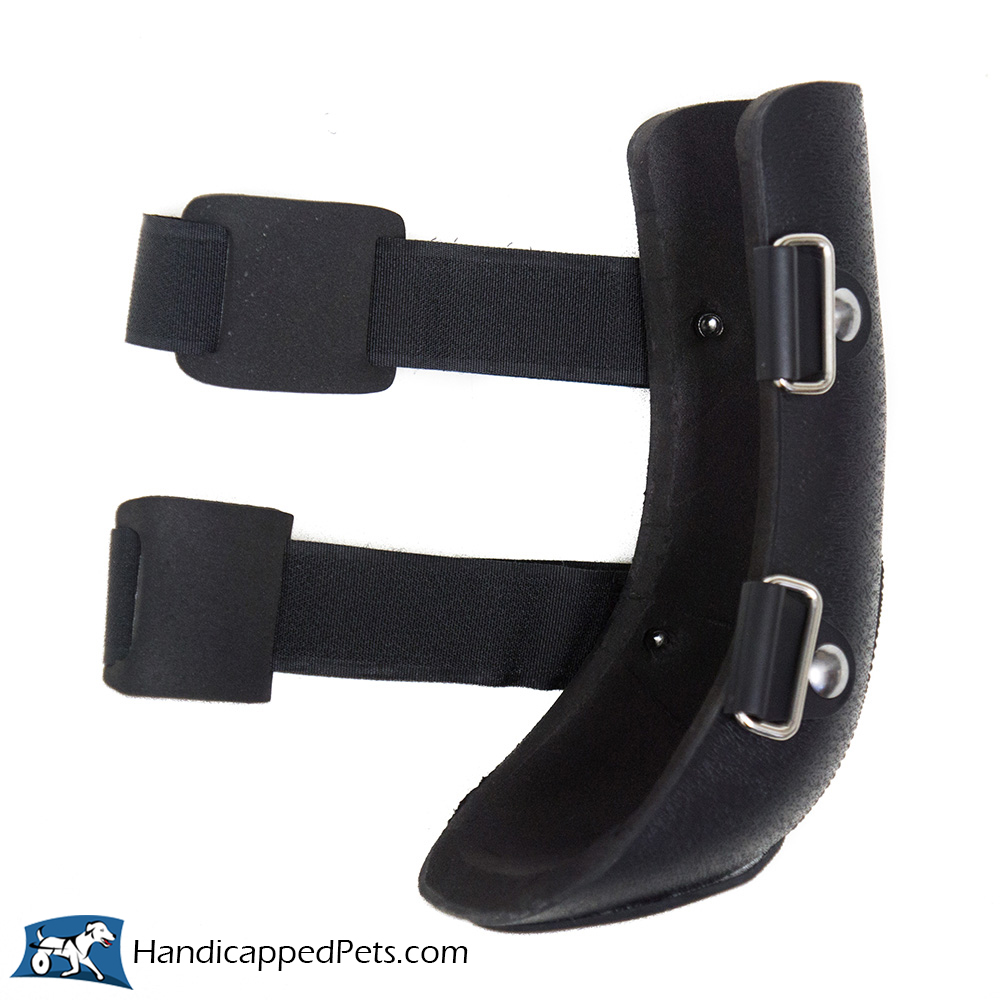
The front or rear Walkin’ Bootie Splint will support the lower aspect of the rear and front limb. This brace extends under the paw to stabilize digit or toe injuries, and provides positioning for knuckling or nerve damage problems.
The Walkin’ Splints are designed for maximum comfort and mobility. It may take a few days for your cat or dog to become acclimated to the feeling of walking around with a splint, but our unique design will have them feeling comfortable quickly.
Features:
- Waterproof
- Keeps the dog’s leg in normal walking position
- Allows weight to be put on the broken or weak limb
- Provides an easy way to provide daily wound therapy
- Reduces the standard cost of bandaging and casting
- Lightweight design increases the tolerance of the splint for the dog
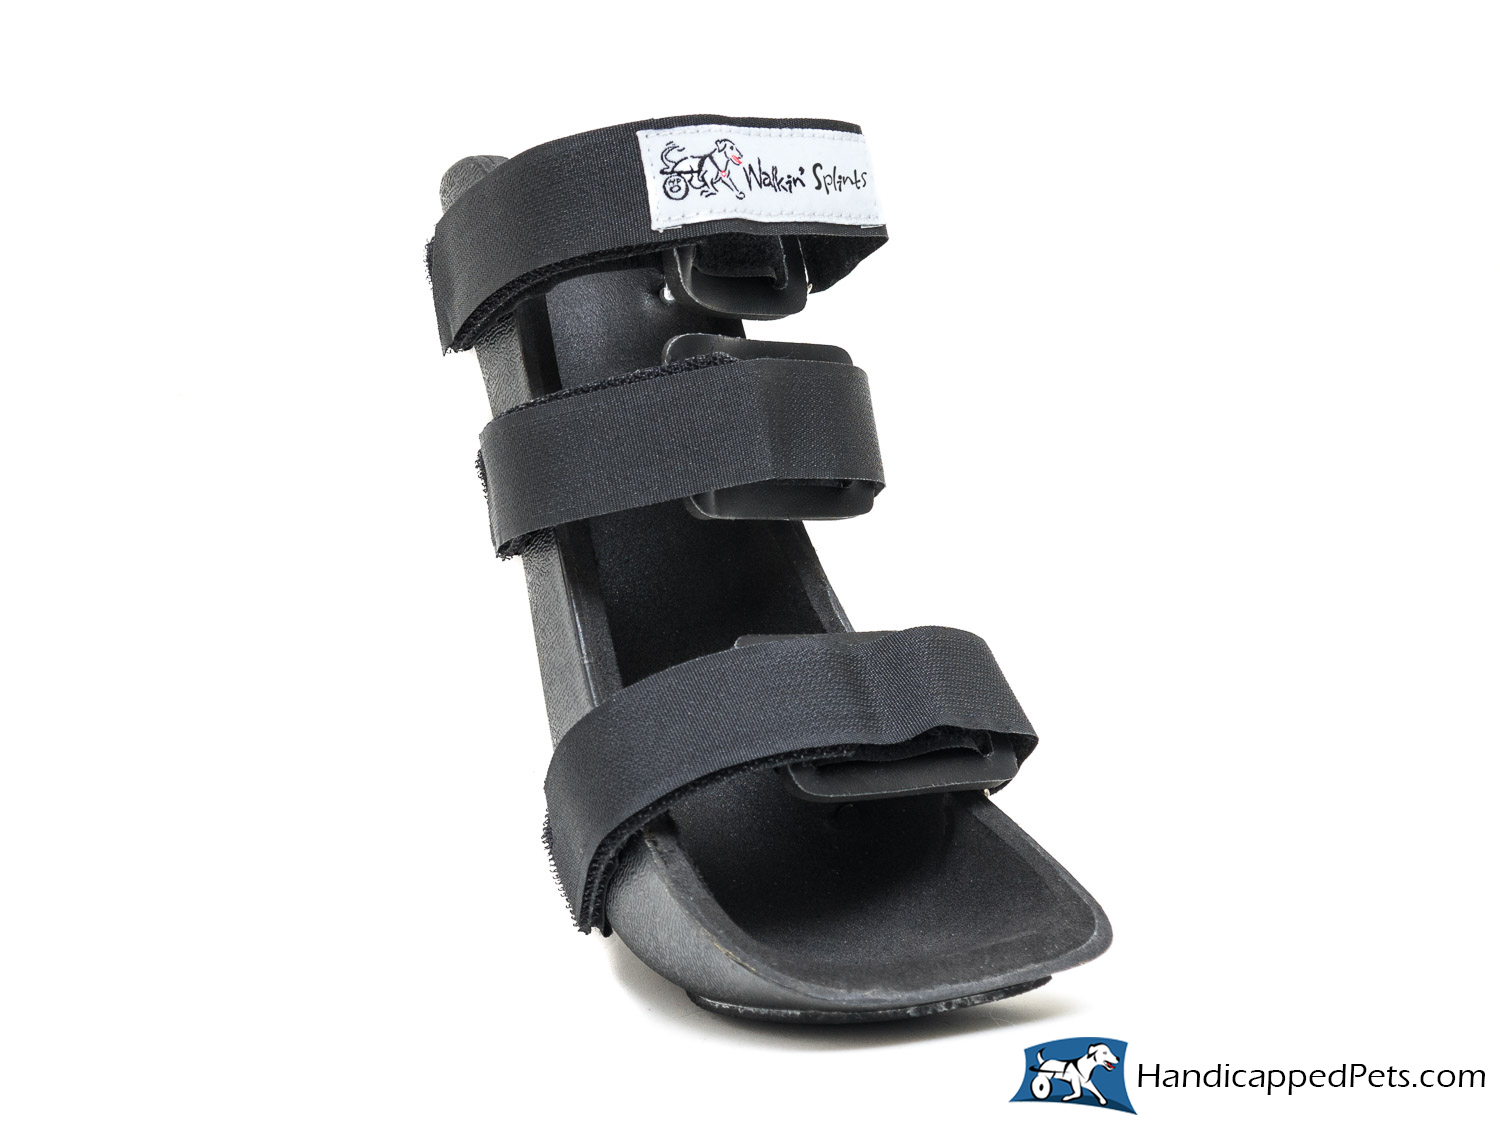
- XSmall, Small, and Medium Bootie Splints include two touch-fastener closures.
- Large and XLarge Bootie Splints include three touch-fastener closures.
The following common conditions may benefit from the Walkin’ Bootie Splint when only lower limb support is needed.
|
Front Leg Use
|
Rear Leg Use
|

|
See next tab for measuring instructions |
||||
| Size | Total Length | Paw width | Recommended Weight Range | Price |
| XSmall | 5.5″
14.0cm |
1.75″
4.4cm |
Under 25lbs | $76.77 Buy Now! |
| Small | 6.5″
16.5cm |
2.25″
5.7cm |
25 – 40lbs | $82.14 Buy Now! |
| Medium | 8″
20.3cm |
2.5″
6.4cm |
40 – 65lbs | $92.54 Buy Now! |
| Large | 8.25″
21.0cm |
2.75″
7.0cm |
65 – 85lbs | $114.22 Buy Now! |
| XLarge | 11″
27.9cm |
3″
7.6cm |
85lbs+ | $114.22 Buy Now! |
It’s important to remember that any splint or bootie placed on a pet’s foot will need to be removed at bedtime, and should be removed for at least an hour during the day to allow the foot to breathe. During night time hours we recommend using either the Walkin’ Hock Hugger or Walkin’ Wrist Hugger to continue to offer light support.
| Related Products: | ||||
| Dog Boots | Front Leg Splint | Rear Leg Splint | Hock Splint | Carpal Splint |
Measurements
Sizes and Measurements
The Walkin’ Bootie Splints come in a range of sizes to fit your pet. The sizes range from XX-Small to X-Large. All splints come with adjustable straps to tighten or loosen the splint perfectly to your pet’s dimensions. Splints will not be effective if they are too loose or too tight.
Please check with your local veterinarian before using the splint on your dog or pet.
Bootie Splints
| Front | Rear | Paw Width |
 |
 |
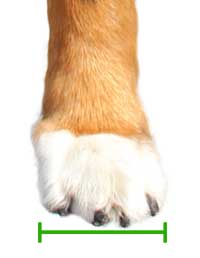 |
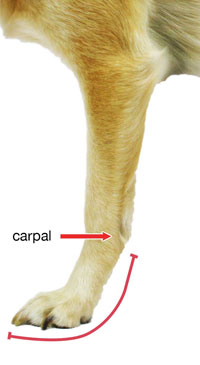
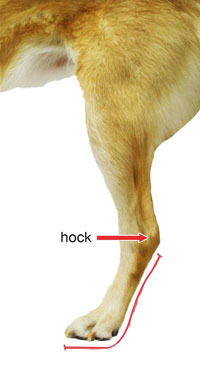
| To determine correct front leg bootie splint size, measure from the end of the longest toenail to 1/2″ below the carpal joint. | To determine correct rear leg bootie splint size, measure from the end of the longest toenail to 1/2″ below the hock joint. | To measure paw width, place dog’s paw on ground so there is a natural splay, and measure the widest part. |
| Size | Total Length | Paw width |
Recommended Weight Range |
Price |
| XSmall | 5.5″
14.0cm |
1.75″
4.4cm
|
Under 25lbs | $76.77 Buy Now! |
| Small | 6.5″
16.5cm |
2.25″
5.7cm
|
25 – 40lbs | $82.14 Buy Now! |
| Medium | 8″
20.3cm |
2.5″
6.4cm
|
40 – 65lbs | $92.54 Buy Now! |
| Large | 8.25″
21.0cm |
2.75″
7.0cm
|
65 – 85lbs | $114.22 Buy Now! |
| XLarge | 11″
27.9cm |
3″
7.6cm
|
85lbs + | $114.22 Buy Now! |
The A red measurement is the inside measurement of the splint
- XSmall, Small, and Medium Bootie Splints include two touch-fastener closures.
- Large and XLarge Bootie Splints include three touch-fastener closures.
Usage
How to Introduce a Splint to Your Pet
It’s important to remember that any splint or bootie placed on a pet’s foot will need to be removed at bedtime, and should be removed for at least an hour during the day to allow the foot to breathe.
When introducing a new splint to a pet, it’s important to start slowly. Positive reinforcement methods, using praise, treats, or toys should always be used in association with the splint. The splint will initially make the pet walk “funny” or maybe not want to walk at all. Using positive reinforcement to encourage walking is always the best approach.
Day One: Place splint on pet for 10-15 minutes at a time, then remove. Try these short sessions 3 to 4 times during Day One.
Once the splint is removed, look for any areas of irritation or rubbing on the pet’s skin that may have been caused by the splint. If you notice an area of rubbing, please consult one of our customer service representatives for fitting assistance, and your veterinarian with any medical concerns.
Remember that every pet is different; it may take pets longer than a few days to get used to the splint, and that’s OK. It’s more important to make sure the pet is comfortable with the splint and the fit is correct than to rush the process. Continue with these short sessions until your dog adjusts. If you are concerned that the fit isn’t correct, please contact our customer service department or consult with your veterinarian.
Day Two: If your pet is having a hard time adjusting to wearing the splint, continue with the short 10-15 minute sessions, as described in Day One. If your pet seems to be walking a little better and is getting used to the splint, then it’s time to increase the session length a bit.
Place splint on for 15-30 minutes at a time, then remove. Try these sessions 3 to 4 times during Day Two. Again, look for any signs of discomfort, and respond accordingly.
Day Three: If your pet is still having a hard time, continue with the short 10-15 minute sessions, as described in Day One. If the pet seems to be walking a little better than in Day Two and is getting used to the splint, then it’s time to increase session length again.
Place splint on for 30-60 minutes at a time, then remove. Try these sessions 3 to 4 times during Day Three. Once again, look for any signs of discomfort, and respond accordingly.
Ongoing: Once the pet is able to comfortably wear the splint for 4 hours or more in the day, and no areas of rubbing or irritation are present, it’s all right to increase wear time to almost a full day, if needed. If you are unsure how long the splint should be worn based on your dog’s medical condition, it’s always best to consult with your veterinarian.
FAQ
FAQs
“How Long Should My Pet Wear the Walkin’ Splint?”
Splints are not designed to be left on your pet for a long period of time. Introduce your pet to the splint by slowly fitting the splint onto your pet, and do this for the first handful of times your pet has to wear the splint. Have your pet wear the splint for two hours on, following two hours off. When your pet is resting or relaxed for a long period of time, keep the splint off. Always remove the splint overnight.
“How do I use a Dog Splint?”
Injuries to the lower limb of small animals often need to be splinted or braced. Please see your veterinarian to determine whether this is the best treatment for your pet. These splints can be used on the lower leg for stability and support and are available in a full range of sizes with different shapes to accommodate the front or rear leg comfortably. Your pet should always be supervised when using the splint.
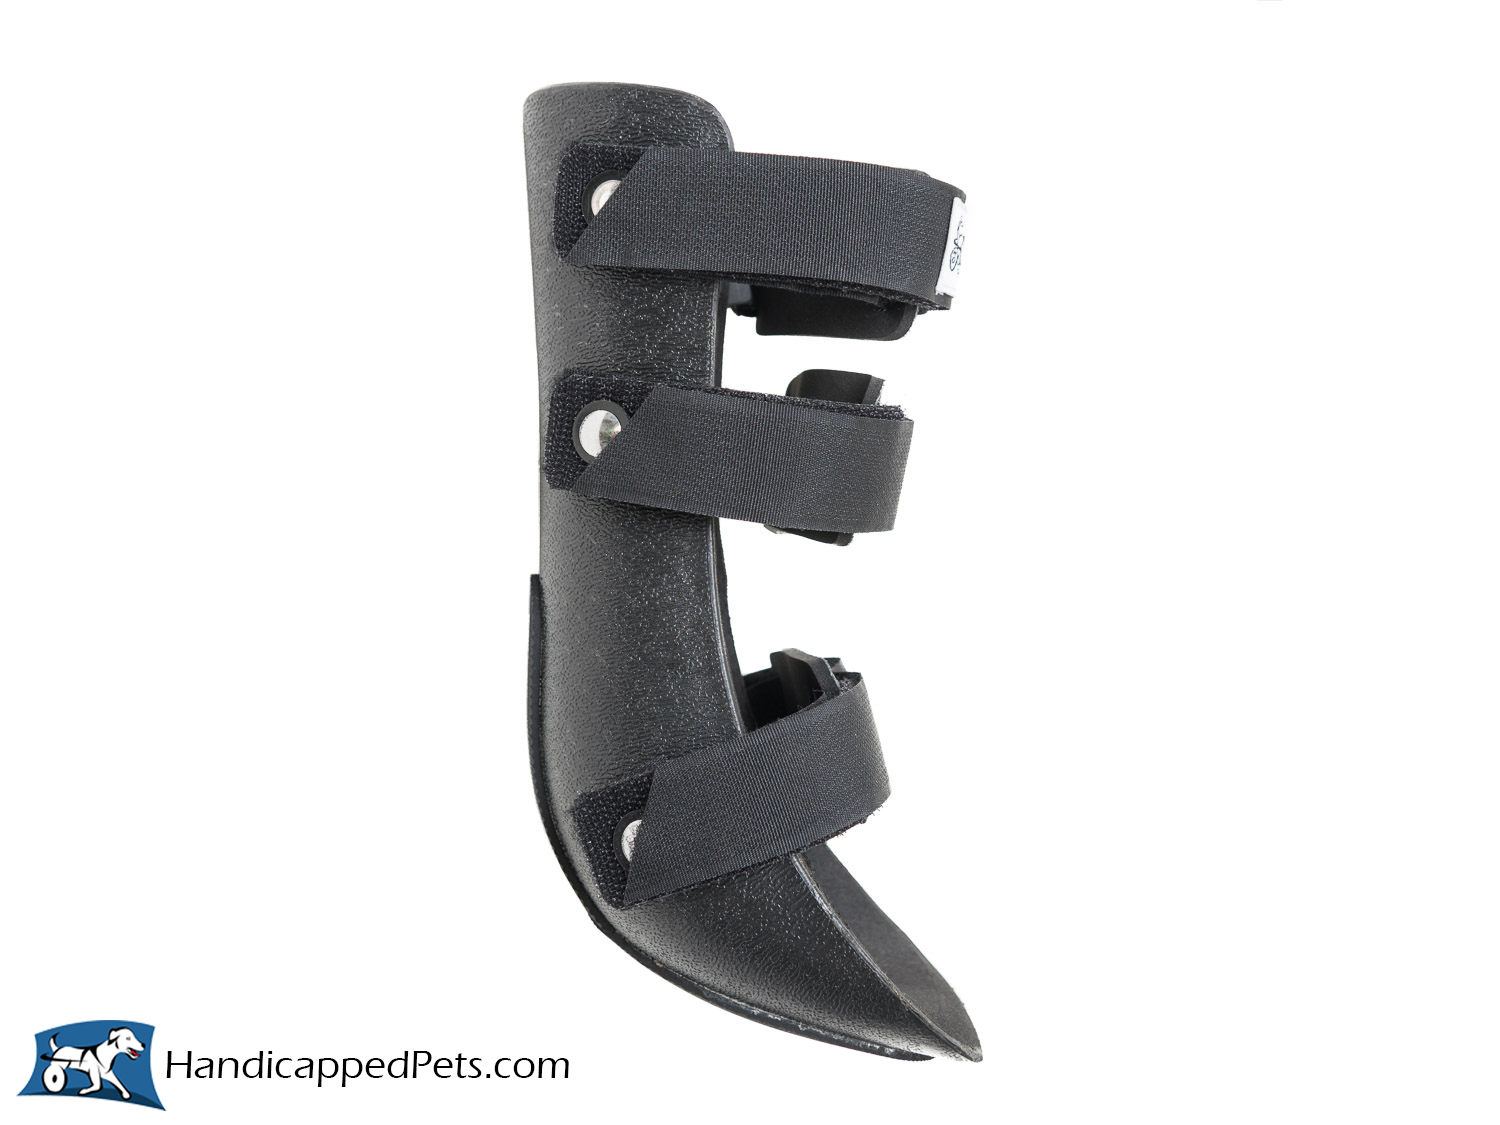
Walkin’™ Pet Splints are placed on the back of the leg and held in place by padded Velcro straps. They extend about halfway up the leg. The bottom of the splint extends completely under the paw to provide weight-bearing support. This is ideal for fractures, knuckling, and other ailments.
Splints are made of hard plastic with a soft foam lining and a non-skid pad on the bottom. The non-skid pad will not work well on some slippery surfaces. Before using the splint, test it on the surface to make sure it will grip adequately.

Walkin' Pet Splints for Dogs and Cats - Overview
Fitting Instructions
Splints should be used only when recommended by a pet care professional who will determine whether the splint is appropriate, how long it should be worn, and what problems might occur that would indicate that use of the splint should be discontinued. These include chafing, muscle atrophy, or extreme distress of the animal.
The First Time
Occasionally, animals resist having the splint put on and may try to escape. An animal with a splint halfway on can injure himself or herself. Put the splint on in an enclosed area and secure the pet with a leash or other restraint. As you start to put on the splint, reward the pet with special treats. Start with two to three minute sessions and increase the time as your pet gets used to the splint.
Putting the splint on your pet
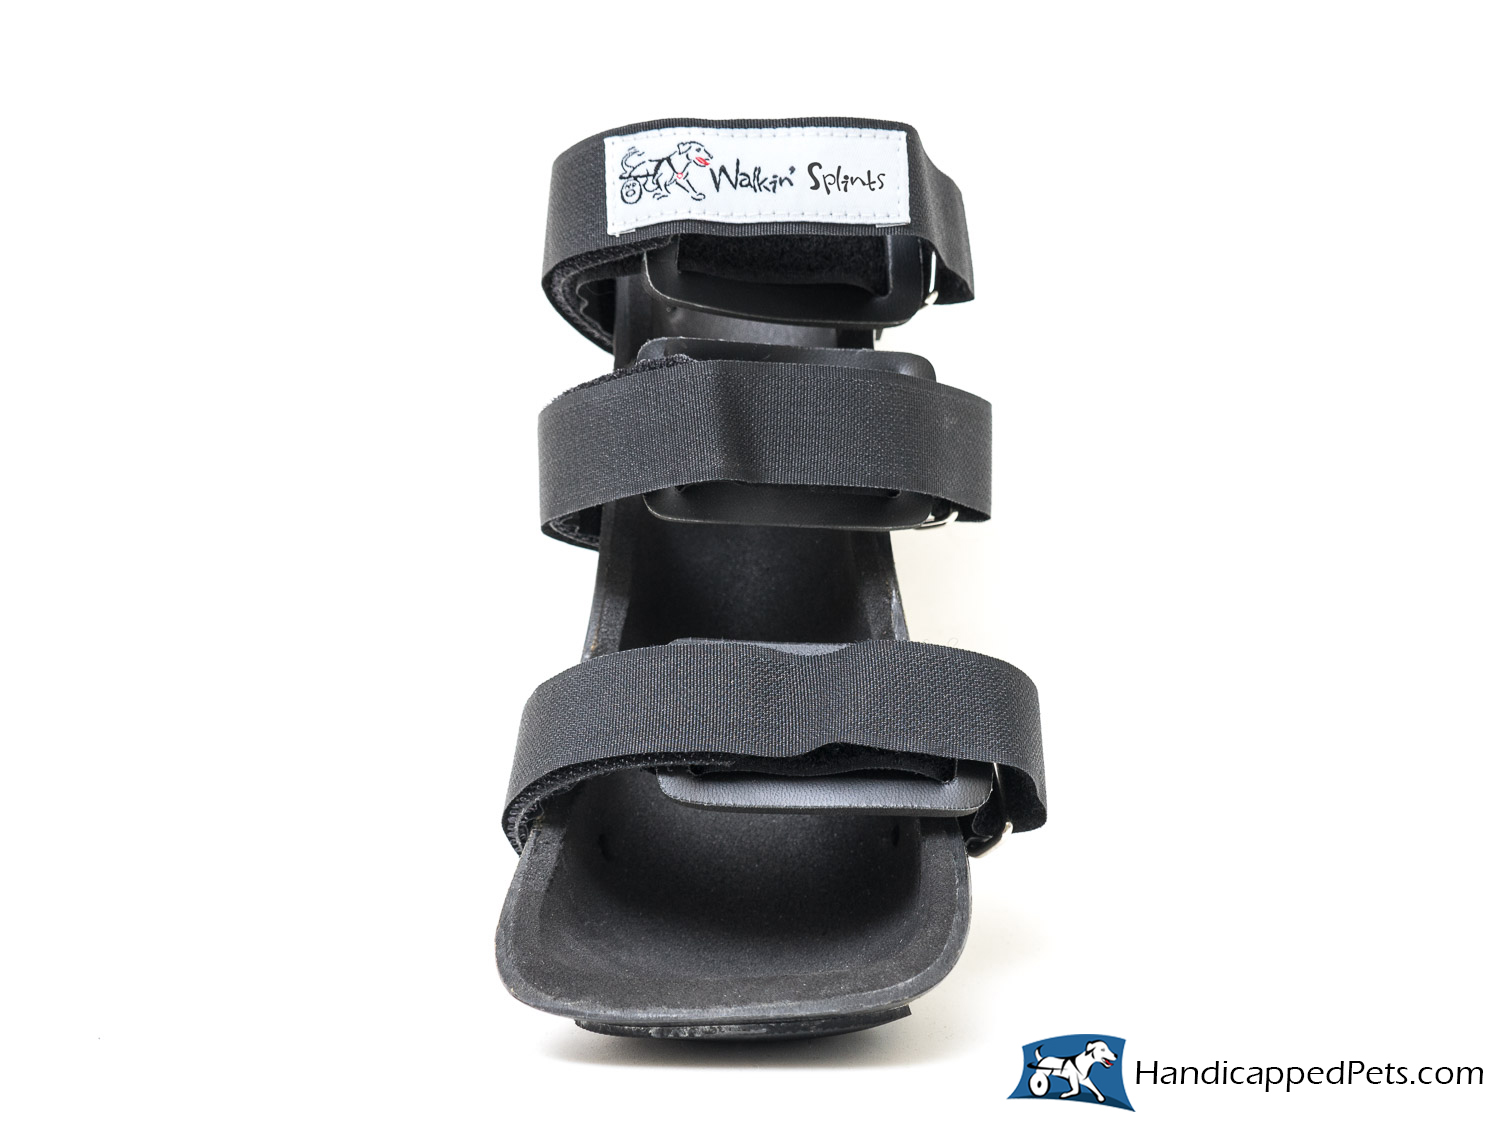
Putting a sock on the leg before applying the splint is sometimes more comfortable for the dog. Front splints should be applied on a sitting animal. Start at the bottom, placing the foot flat in the bottom of the splint, making sure that the toes do not extend over the bottom edge. Snug the bottom strap first. Check for a snug fit after the animal has taken a few steps.
“Can my dog sit and lay down with a splint on?”
Yes, your pet can sit and lay down with our splints.
“My dog has a rear limb Knee problem (ACL or Patella). Will a Splint work for my dog?”
No, splints will support the lower limb for the animal but will not go high enough to support the knee on the dog. Click here for a possible alternative.
“My dog seems to fall in-between sizes in your chart, should I order the larger size?”
If your loved one’s measurement falls between sizes, please call us at 1-888-253-0777 and our Customer Service Department will help you to determine the correct size.
“Can I change or remold the splint with heat?”
Yes, you can heat and Flair the plastic away from a problem area but you can not change the angle of the splint. You will need a Heat Gun to do any modifications and, of course, the splint is non-returnable.
“Does the splint have any tread or soling on the bottom so the dog will not slip?”
Yes, the splints have a non-skid soling surface on the bottom.
“Do the splints have any padding inside and can it be cleaned?”
Yes, the splints are fully lined with a closed cell foam that can be washed.
Photos
Click to enlarge
Buy Now!
| Front | Rear | Paw Width |
|
|
|
| To determine correct front leg bootie splint size, measure from the end of the longest toenail to 1/2″ below the carpal joint. | To determine correct rear leg bootie splint size, measure from the end of the longest toenail to 1/2″ below the hock joint. | To measure paw width, place dog’s paw on ground so there is a natural splay, and measure the widest part. |
| Size | Total Length | Paw width |
Recommended Weight Range |
Price |
| XSmall | 5.5″
14.0cm |
1.75″
4.4cm
|
Under 25lbs | $76.77 Buy Now! |
| Small | 6.5″
16.5cm |
2.25″
5.7cm
|
25 – 40lbs | $82.14 Buy Now! |
| Medium | 8″
20.3cm |
2.5″
6.4cm
|
40 – 65lbs | $92.54 Buy Now! |
| Large | 8.25″
21.0cm |
2.75″
7.0cm
|
65 – 85lbs | $114.22 Buy Now! |
| XLarge | 11″
27.9cm |
3″
7.6cm
|
85lbs + | $114.22 Buy Now! |
The A red measurement is the inside measurement of the splint
- XSmall, Small, and Medium Bootie Splints include two touch-fastener closures.
- Large and XLarge Bootie Splints include three touch-fastener closures.
It’s important to remember that any splint or bootie placed on a pet’s foot will need to be removed at bedtime, and should be removed for at least an hour during the day to allow the foot to breathe. During night time hours we recommend using either the Walkin’ Hock Hugger or Walkin’ Wrist Hugger to continue to offer light support.
Shipping
Shipping Policy
For shipping Rates please add the items to the cart and the checkout system will calculate this prior to payment
- We will make every effort to ship your order within 1 business day. Express, Overnight orders are usually done first.
- Whenever possible, we will send you a tracking number you can use to find out when your product will be delivered.
- We do not refund shipping charges for any reason. If your shipment is delayed by the carrier and you are entitled to a refund, you will need to deal directly with the carrier. If necessary, we will help you make a claim.
- Some items are drop-shipped directly from the manufacturer. Their policies and ship times may differ.
- While we make every effort to stock every product and size we occasionally are out of stock and if this happens we will contact you that day to discuss options or expected shipping dates
- Shipping days are Business days (Mon-Fri) and do not include weekend pickups or deliveries
| Province | Expedited Post
Not Guaranteed |
Express Post
Guaranteed |
Priority Overnight
See Below* |
| British Columbia | 1-2 Days | 1-2 Days | Next Day |
| Alberta | 3-4 Days | 2-3 Days | Next Day |
| Saskatchewan | 4-5 Days | 2-3 Days | Next Day |
| Manitoba | 4-6 Days | 2-3 Days | Next Day |
| Ontario | 5-7 Days | 2-3 Days | Next Day |
| Quebec | 5-7 Days | 2-3 Days | Next Day |
| Newfoundland & Labrador | 7-9 Days | 3-4 Days | Next Day |
| Nova Scotia | 7-9 Days | 3-4 Days | Next Day |
| New Brunswick | 7-9 Days | 3-4 Days | Next Day |
| PEI | 8-10 Days | 3-4 Days | Next Day |
| Northwest Territories | 7-9 Days | 3-4 Days | Next Day |
| Yukon | 7-9 Days | 2-3 Days | Next Day |
| Nunavut | 13-14 Days | 7-8 Days | Next Day |
*Express and Priority Shipping
- Priority Overnight has a cut off of 1:00pm Mon-Fri and does not guarantee next day delivery in some remote or rural areas, please contact us first to confirm your delivery date
- The shipping calculator on our shopping cart does not always accurately calculate for Express and Priority Overnight shipping and we may need to call you to confirm shipping, delivery rates, times and or other options. Call us for a quote on Express or Overnight Priority shipping.
- Any shipping delivery Guarantees are the Guarantee of the shipping company and are created and decided on by the shipping company, if they deem is was delivered late and you are entitled to a refund, you will need to deal directly with the carrier. If necessary, we will help you make a claim.
Please Note: All orders are shipped once payment has been received. Orders paid by check will not ship until payment has cleared.
International Shipping
Payment may be made by credit card where the credit card companies will guarantee security. In some cases, trade references or a bank check with funds drawn on a Canadian bank may be required.
We’ll gladly ship anywhere on the planet. You will be responsible, though, for shipping and handling charges. The shipping calculator on our shopping cart does not always accurately calculate for International shipping. Email us for a quote on international shipping
All international orders will be verified with customer service thru email before shipping.
Canada Post Express International will arrive at customs in 3-5 business days.
IMPORTANT: Many countries charge taxes, duties, and import fees. You are responsible, and agree to find out if any additional charges apply and pay for all of these charges.
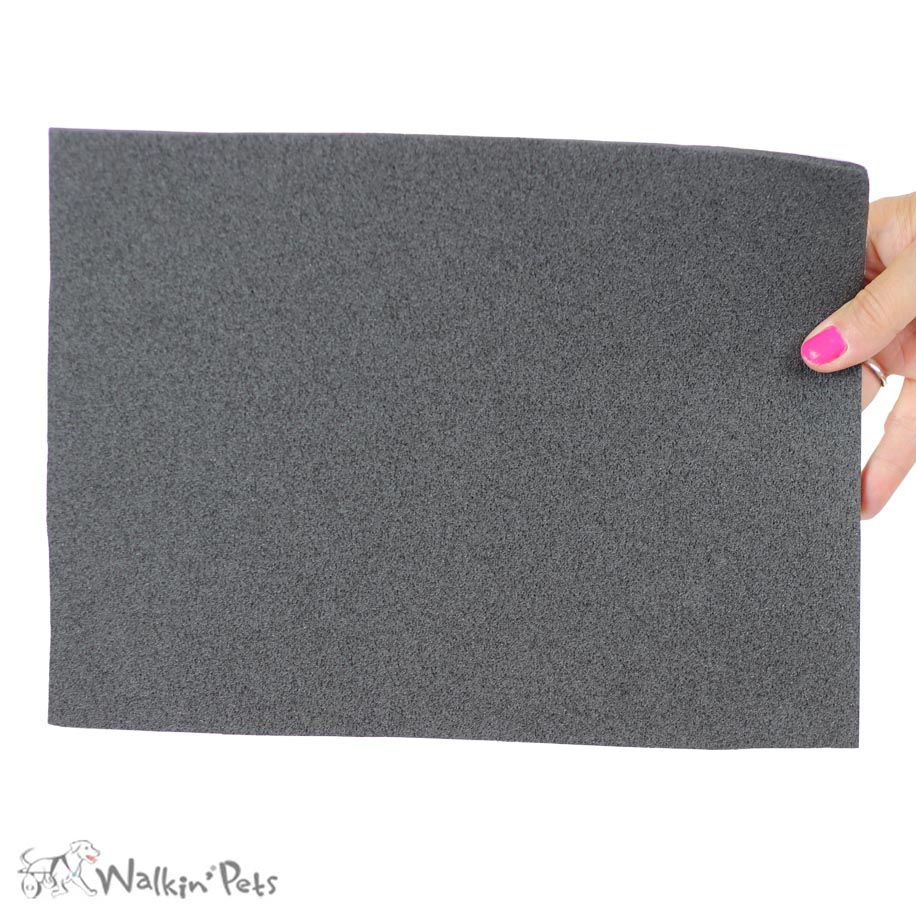
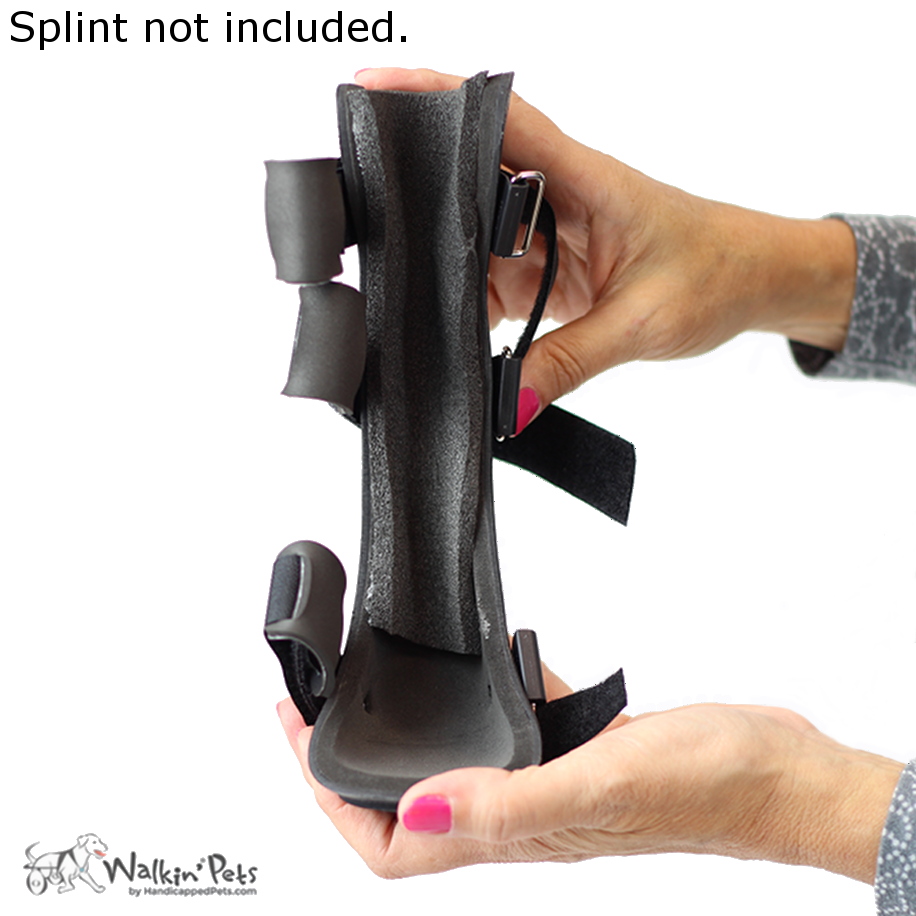
Custom Fit Foam
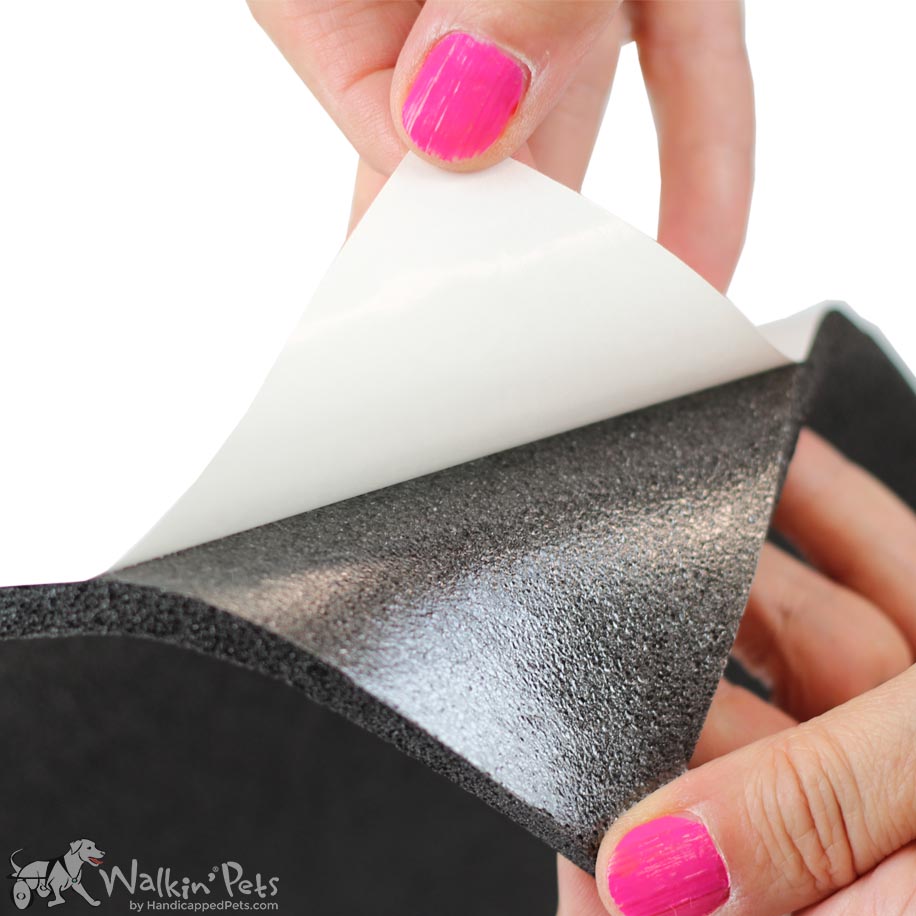
Walkin’ Splints Custom-fit Foam can give your Walkin’ Splint a more custom fit to provide optimal comfort for your pet. Using the included Walkin’ Splints templates, the adhesive-backed foam can be cut and trimmed to fit any size or type Walkin’ Splint (front, rear, hock, carpal, bootie). Then peel the backing and adhere to your splint for a custom fit without the cost!
- 9″ X 12″ adhesive-backed foam.
- 1/4″ thick, Closed Cell Foam Sheet
- Easy to cut and trim foam.
- Pattern templates included to match every size and type of Walkin’ Splint.
- Templates can be modified to suite your dogs needs and fit.
- Instructions included with templates.
 |
 |
 |
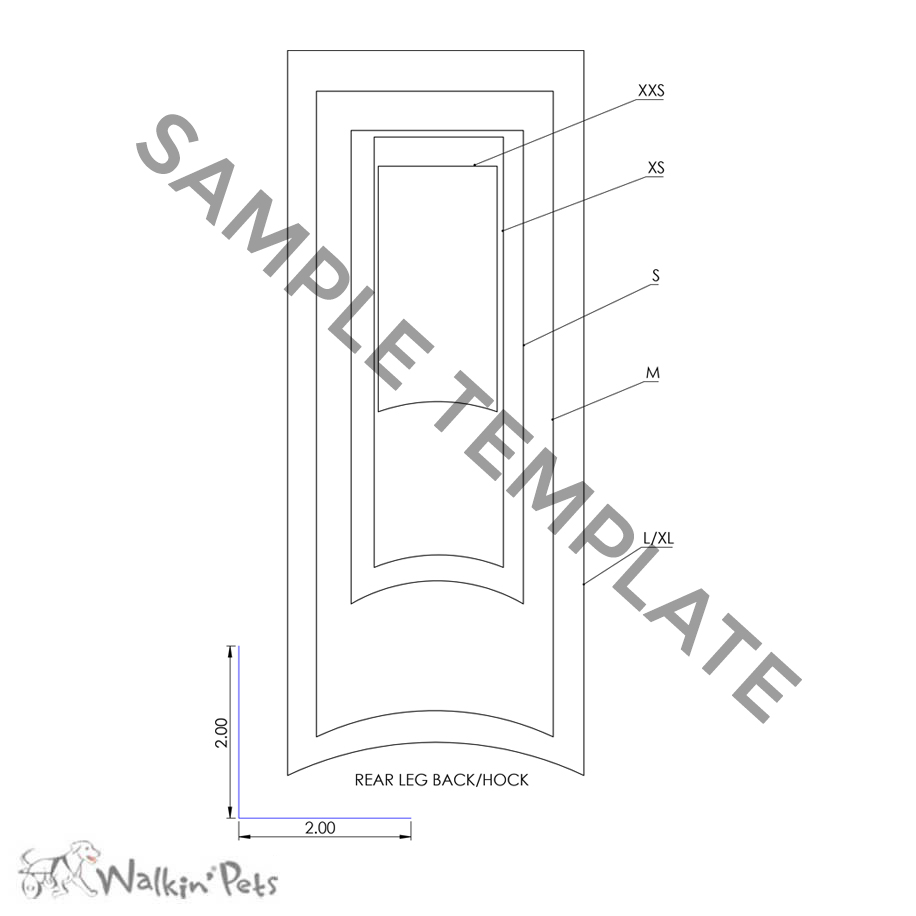 |
Every pet is different, and their needs will vary. The Walkin’ Splint Custom-fit
Foam template is a guideline for the most common shapes needed to customize the fit of your Walkin’ Splint. Each template can be cut, trimmed, or altered for your pet’s comfort – every pet is different!
Choose a pattern template that matches the type of splint you have (front, rear, hock, carpal, bootie).
- Cut template from pattern sheet, choosing the size that matches your splint size.
- Trace or tape cut shape to paper-backed side of foam sheet.
- Carefully cut shape.
- Before removing backing, check fit, and trim if necessary.
- Once completely satisfied with fit of splint on pet’s leg, peel backing and adhere to splint.
Please note: If additional support is needed, foam can be stacked.

Walkin' Splints Custom-Fit Foam Instructional Video!
Please note: Once foam and or splint are cut or modified they are final sale.
The Walkin’ Bootie Splint will support the lower aspect of the rear and front limb. This brace extends under the paw to stabilize digit or toe injuries, and provides positioning for knuckling or nerve damage problems.
| |
|
| Your pet deserves to be a star! Send us an email with photos or videos of your pet enjoying their newfound mobility and include a short story. Your pet will be featured in our blog! |
|